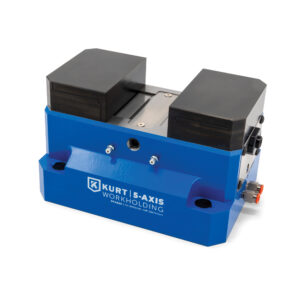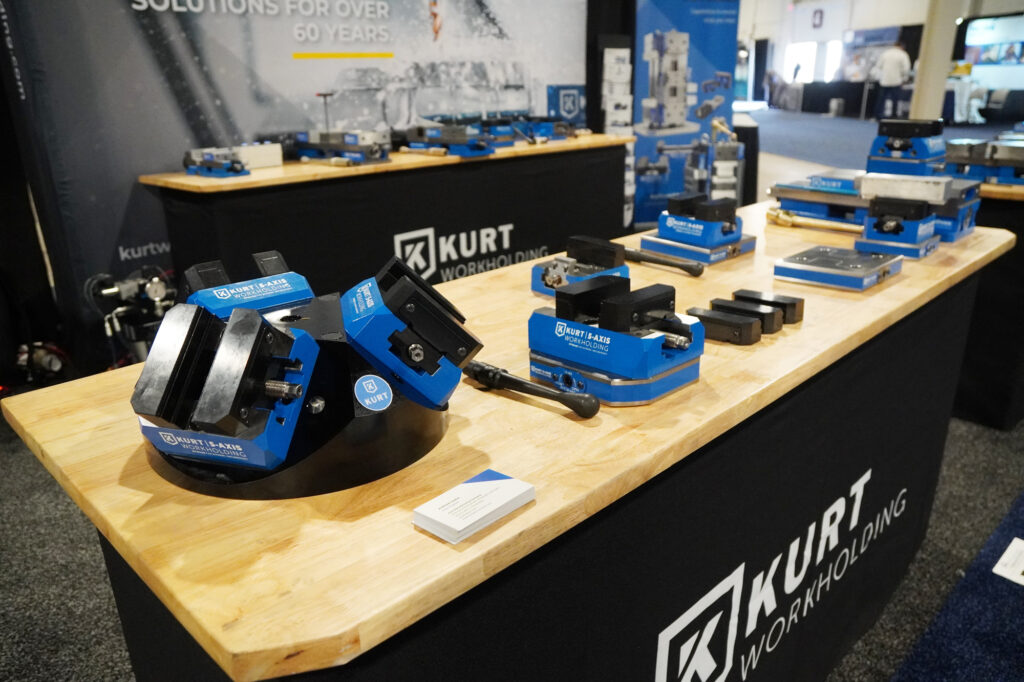
Your 5-axis machining center can reach five sides of a part in a single setup. But that capability means nothing if the vise allows jaw lift, introduces positional error, or costs you ten minutes every changeover. Choosing the right precision CNC vise for 5-axis work determines whether your shop captures the full throughput and accuracy those machines were designed to deliver.
This guide covers every factor that goes into selecting a 5-axis vise. We will cover how jaw lift, repeatability, clamping force, and setup speed interact, what distinguishes a purpose-built 5-axis vise from a standard milling vise adapted for the role, and how to evaluate options against the parts you actually run.
Key Takeaways: How to Choose a 5-Axis Precision CNC Vise
- A 5-axis vise must deliver tool clearance, rigid clamping, and repeatable positioning across all rotary orientations.
- Jaw lift during clamping introduces positional error that compounds across multi-face machining operations.
- Self-centering designs reduce setup time and maintain a consistent work coordinate origin between parts.
- Quick-change base systems with pull stud interfaces cut changeover time from minutes to seconds.
- Kurt Workholding AngLock® vises minimize jaw lift through a mechanical wedge that forces the movable jaw downward.
5-Axis CNC Vise Comparison: Features to Evaluate
When comparing vises from different manufacturers, standardize your evaluation around these criteria. Each row represents a measurable attribute you can verify with specifications or testing.
| Feature | What to Measure | Why It Matters for 5-Axis |
| Jaw Lift Control | Lift in thousandths of an inch at rated torque | Prevents positional error across machined faces |
| Repeatability | Position deviation over 20+ load cycles | Maintains work offset consistency in production |
| Clamping Force at Jaw Face | Force in pound-force (lbf) or kilonewton (kN) at specified input torque | Must exceed cutting forces in worst-case orientation |
| Vise Body Height | Overall height from table surface to top of jaw | Lower profile reduces collision risk during rotation |
| Jaw Change Time | Seconds to swap jaw sets | Reduces spindle-off time between job changeovers |
| Quick-Change Base Compatibility | Pull stud pattern (52 mm, 96 mm, or proprietary) | Enables sub-minute vise swaps and standardized setups |
| Automation Integration | Pneumatic/hydraulic actuation, M-code control | Required for robotic loading and lights-out operation |
Want to get straight to the practical guidance? Jump to our step-by-step guide to choosing a 5-axis vise or browse our 5-axis CNC vise FAQs.
What Makes a 5-Axis CNC Vise Different from a Standard Milling Vise?
A standard milling vise is designed for 3-axis work where the spindle approaches from above. The vise body can be tall, the jaws wide, and the overall footprint large without creating tool interference. On a 5-axis machine, the table tilts and rotates, so the spindle approaches from multiple angles.
A purpose-built 5-axis vise addresses this with a compact, low-profile body that keeps the workpiece exposed on as many faces as possible. The reduced height and narrower jaw profile prevent collisions between the vise body and the spindle, toolholder, or machine column during rotary moves.
Beyond physical clearance, a 5-axis vise must hold the part accurately through dynamic motion. Centrifugal and gravitational forces shift as the table rotates. A vise that performs well in a fixed horizontal orientation may allow micro-movement when the table tips to 90 degrees. Rigid construction and controlled clamping force distribution are essential.
Why Jaw Lift Matters in 5-Axis Machining
Jaw lift occurs when the movable jaw rises slightly as the clamping screw applies force. In a traditional screw-driven vise, the thread angle pushes the jaw both forward and upward. On a 3-axis machine, this lift may only affect the Z-axis position by a few tenths. On a 5-axis machine, that positional error propagates across every face you machine.
Consider a part that requires features on five faces. If the vise lifts the part by 0.002 inches during clamping, every subsequent face carries that error. You lose parallelism between opposing faces, hole positions shift, and surface profiles drift out of tolerance. For aerospace and medical components, those errors mean scrap.
Kurt Workholding’s AngLock® mechanism addresses jaw lift at the mechanical level. A wedge geometry between the screw and the movable jaw converts the rotational force into a downward and forward motion, actively pulling the jaw toward the vise bed as clamping force increases. This is not a passive friction-based system. The mechanism produces a measurable reduction in jaw lift compared to conventional screw-driven designs.

How to Evaluate Clamping Force for 5-Axis Applications
Clamping force requirements for 5-axis machining differ from 3-axis work. In 3-axis milling, gravity assists the clamping system because the cutting forces push the part into the vise bed. In 5-axis machining, the part may be oriented sideways or inverted during portions of the cycle, meaning clamping force alone must resist cutting loads without gravitational assistance.
Calculate the maximum cutting force your toolpath generates. Include the worst-case orientation where gravity works against the clamp. Then apply a safety factor of at least 2x to account for interrupted cuts, tool engagement spikes, and material variations. Your vise’s rated clamping force at the jaw face should exceed this value.
Keep in mind that clamping force at the jaw face is not the same as the force applied to the screw. Mechanical advantage, friction losses, and the vise’s internal mechanism all affect the actual force delivered to the workpiece. Specification sheets that list only input torque without jaw-face force values are incomplete.
Repeatability and Part Positioning Accuracy
Repeatability defines how consistently a vise returns the workpiece to the same position after opening and closing. For 5-axis work, repeatability matters in three dimensions. The part must return to the same X, Y, and Z position within your tolerance budget each time you load a new blank.
Self-centering vises improve repeatability by eliminating operator-dependent positioning. Both jaws move symmetrically toward the center, placing the workpiece at a known coordinate origin regardless of blank size variation. This is critical for maintaining consistent work offsets in your CAM program.
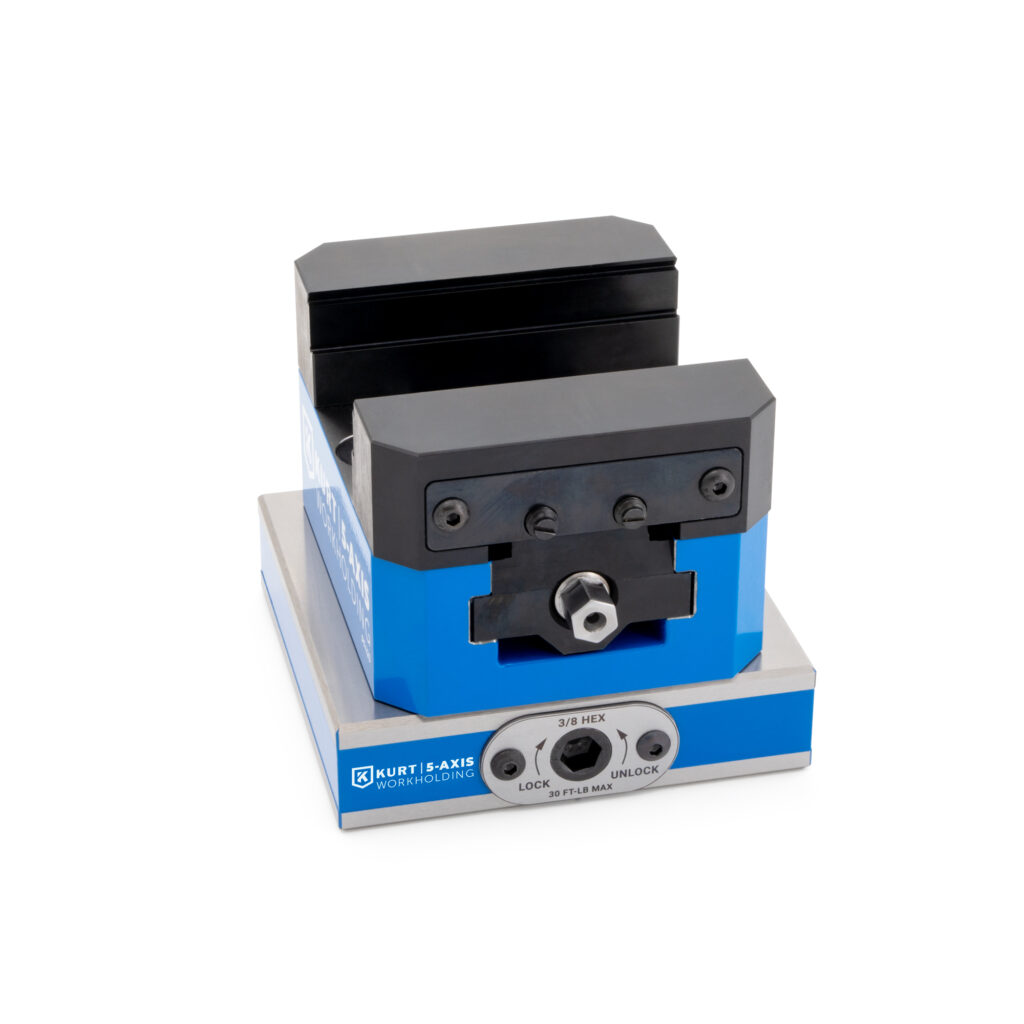
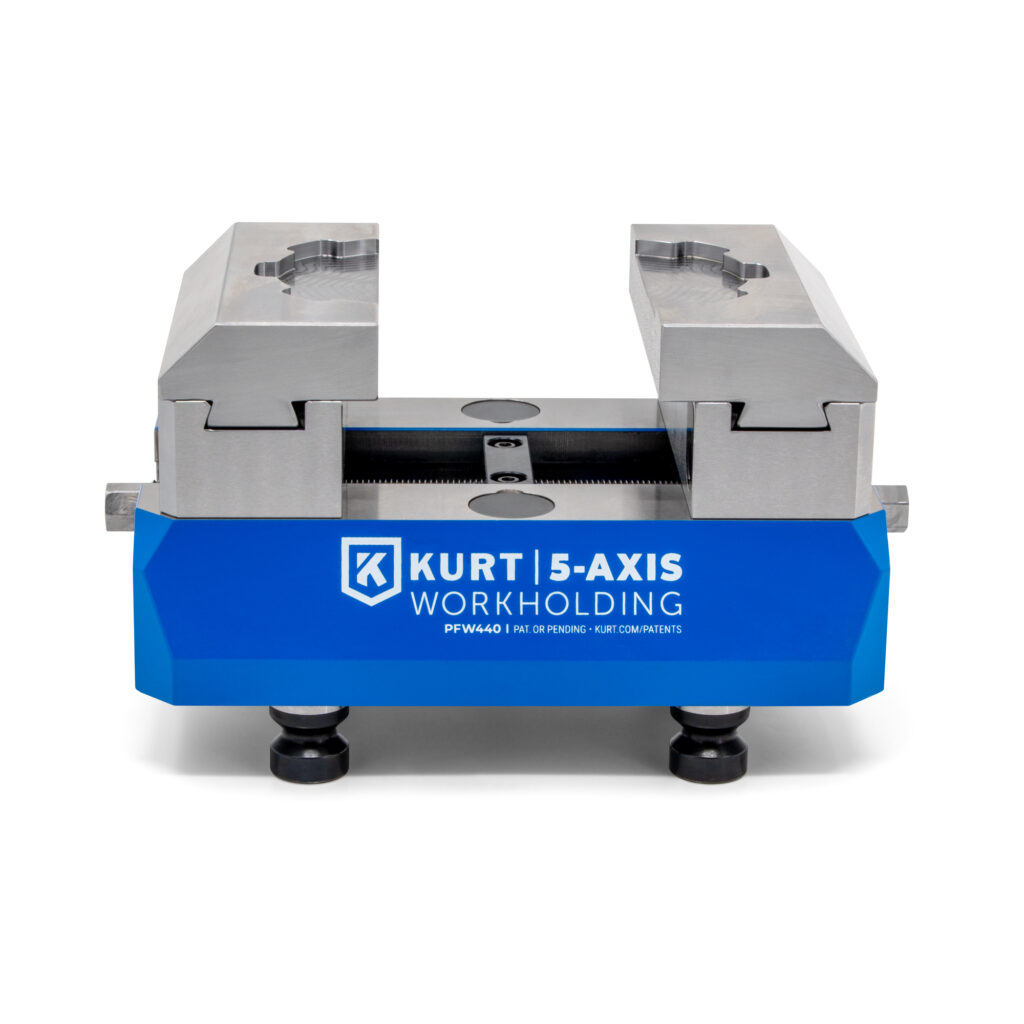
Kurt’s PF and PFW Series 5-Axis Vises combine self-centering jaw movement with the AngLock® clamping mechanism. The quick-lash adjustment allows operators to set the centering point and maintain it across production runs without re-indicating.
Setup Speed: How Quick-Change Systems Cut Changeover Time
Setup time on a 5-axis machine is expensive. These machines command higher hourly rates than 3-axis equipment, so every minute of spindle-off time has a larger financial impact. A vise that requires 15 minutes of indicating and alignment after every job change erodes the productivity advantage of 5-axis capability.
Quick-change base systems use pull studs and receiver plates to mount and locate the vise in a single motion. The pull studs engage precision-bored receivers, establishing the vise position without manual indication. An operator drops the vise onto the base, locks the pull studs, and the machine is ready to cut.
Kurt Workholding offers quick-change base systems in both 96 mm and 52 mm pull stud spacings. The 96 mm system accommodates the PFW Series vises for larger workpieces and wider jaw openings. The 52 mm system supports the PF Series vises in compact, high-density fixturing layouts. Both systems enable vise swaps in seconds rather than minutes.

Self-Centering vs. Fixed-Jaw Vises for 5-Axis Work
Fixed-jaw vises position the workpiece against a single reference surface. The movable jaw pushes the part toward the stationary jaw, and the part’s position depends on the jaw face and the blank’s dimensions. Any variation in blank size shifts the part’s center position.
Self-centering vises move both jaws equally toward the center of the vise body. The part’s center position remains constant regardless of dimensional variation in the raw stock. For 5-axis machining, this consistency simplifies CAM programming because the work coordinate origin stays fixed from part to part.
Self-centering designs also reduce the manual effort required to establish a consistent setup. With a fixed-jaw vise, you may need to shim or adjust the part to maintain center. With a self-centering vise, the mechanical design handles alignment automatically. The trade-off is that self-centering vises typically provide slightly less raw clamping force per unit of input torque compared to a fixed-jaw design of the same size.
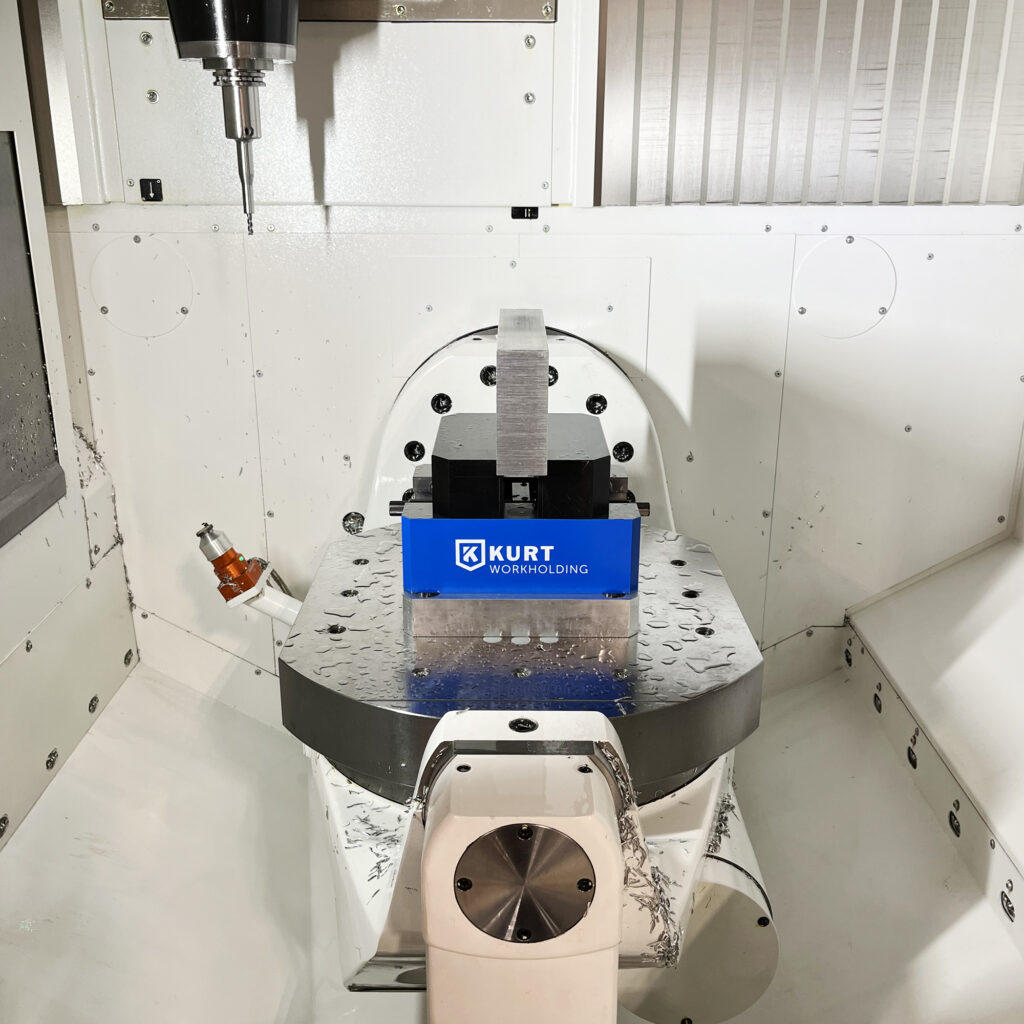
Jaw Selection for 5-Axis Precision CNC Vises
The jaws are the contact point between the vise and your workpiece. Jaw selection directly affects grip security, part marking, and the accessible machining envelope. For 5-axis applications, jaw height is critical because taller jaws reduce tool clearance during rotary moves.
Serrated Jaws for Raw Stock
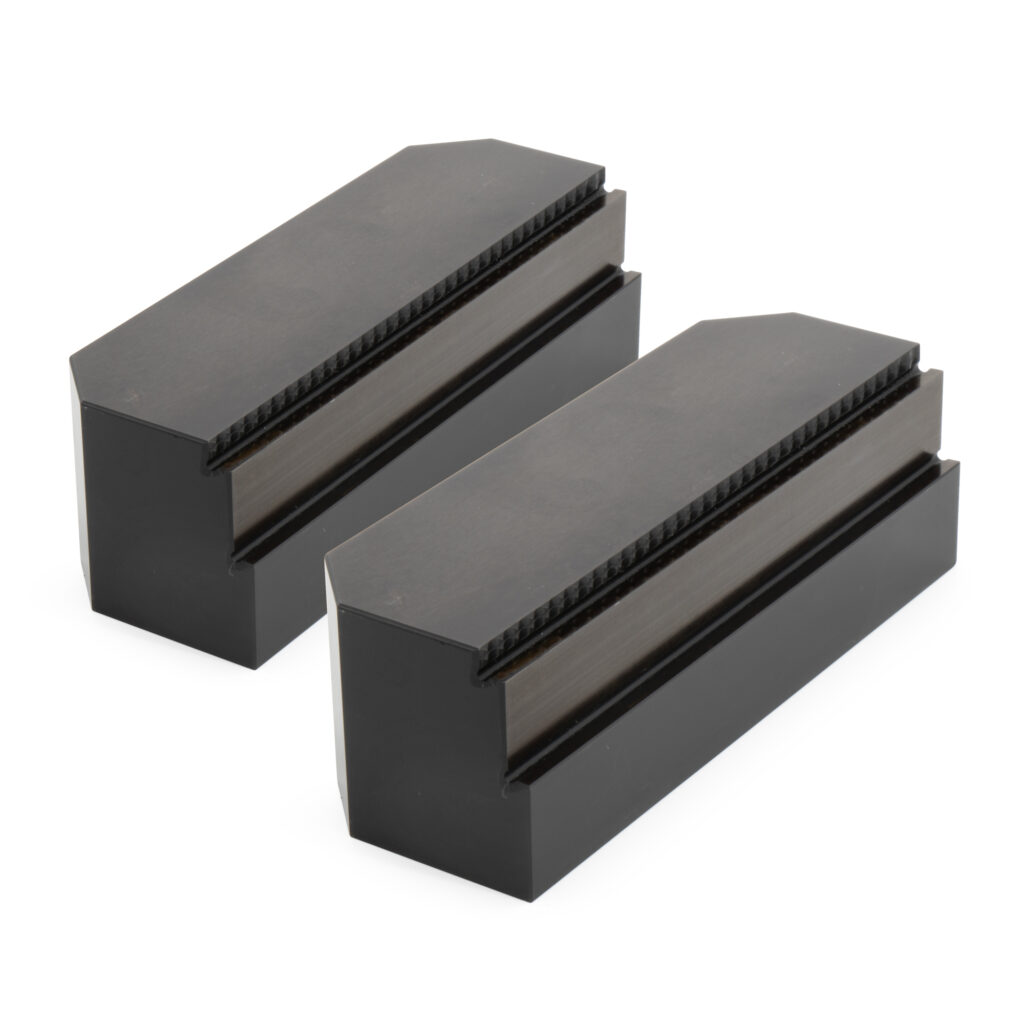
Serrated jaws provide maximum grip on raw billet material. The teeth bite into the stock surface, preventing slippage under heavy cutting loads. Use serrated jaws for first-operation roughing where surface finish on the clamping area is not a concern.
Machinable Soft Jaws for Finished Parts
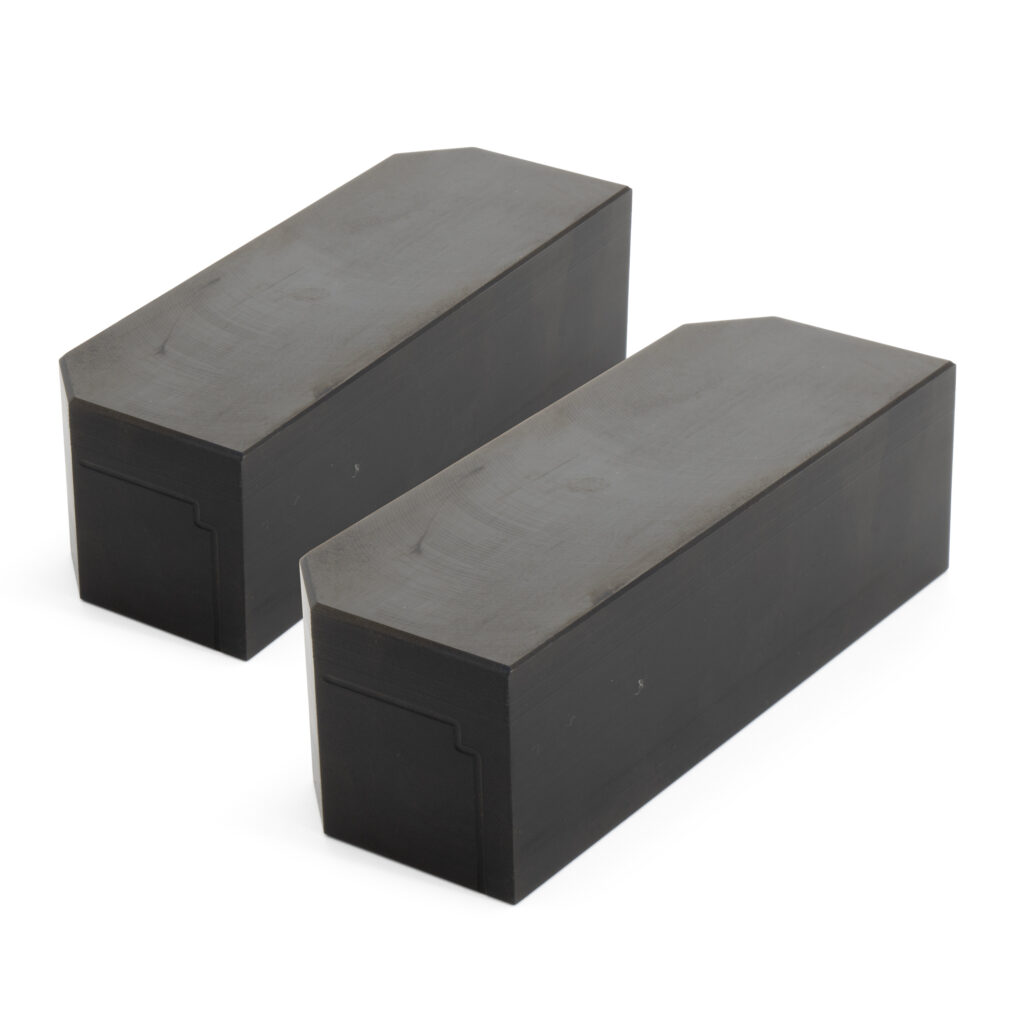
Soft jaws are blank aluminum or mild steel jaw inserts that you machine to match your part’s profile. They distribute clamping force across a larger contact area and prevent marking on finished surfaces. Soft jaws are standard practice for second-operation and finish-machining setups on 5-axis machines.
CARVESMART Dovetail Jaws for Fast Changeovers
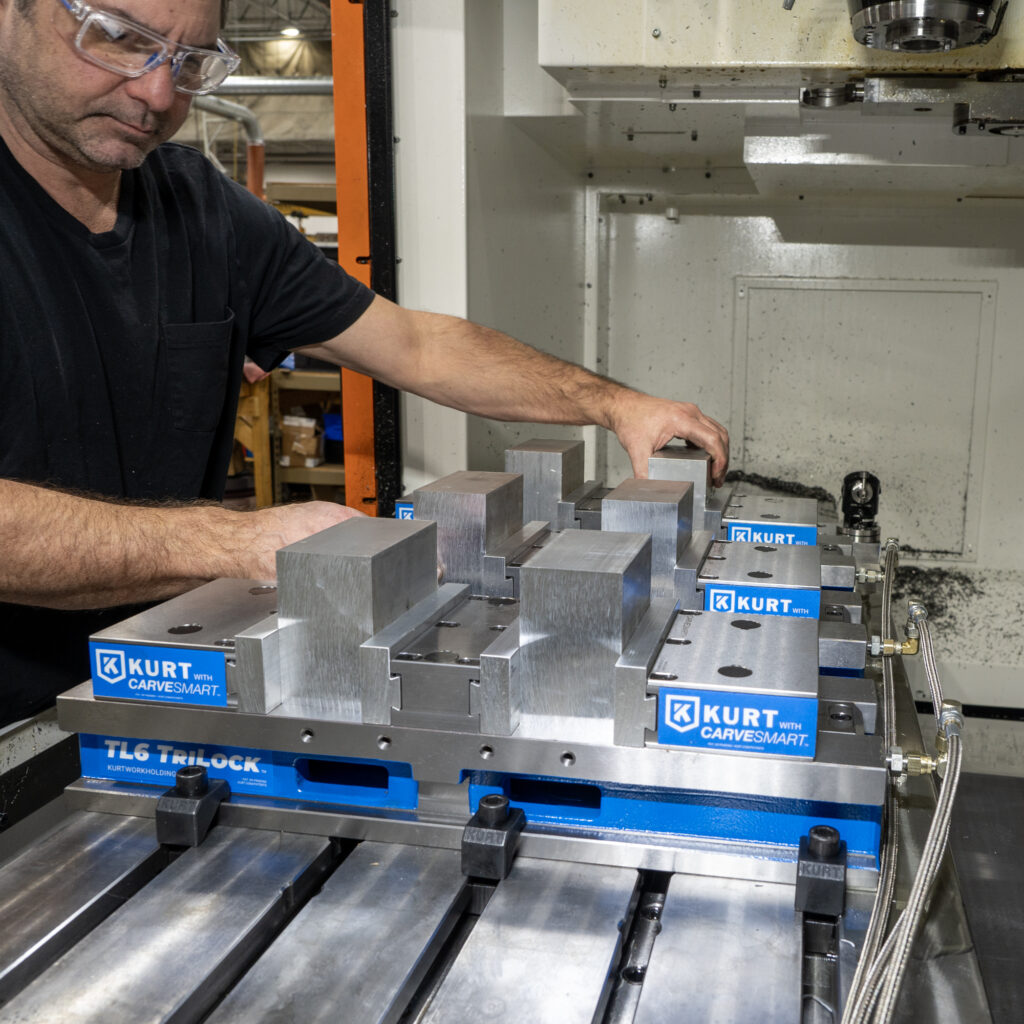
Kurt’s CARVESMART jaw system uses a patented dovetail mounting interface that locates precisely with every jaw change. You slide the jaw into the dovetail slot, tighten a single fastener, and the jaw seats in the same position every time. Jaw swaps require only a hex wrench and take seconds, not minutes. This system delivers the same rigid hold as a traditional bolt-on jaw while eliminating the re-indication step.
How to Match a 5-Axis Vise to Your Part Geometry
Part geometry determines which vise configuration provides the access and clamping stability you need. Start by mapping the surfaces your toolpath must reach, then identify which surfaces can serve as clamping areas.
Prismatic Parts
Rectangular or block-shaped parts are the simplest case. A standard self-centering vise with flat jaws provides adequate clamping on two parallel faces. The remaining four faces are accessible for machining. Ensure the jaw height is low enough to clear the toolholder during angled approaches.
Complex Contoured Parts
Parts with curved surfaces, undercuts, or thin walls require soft jaws machined to the part profile. The jaw contact area must support the part against cutting forces without deforming thin sections. Consider clamping on a sacrificial boss or dovetail feature that you machine into the raw stock specifically for workholding, then remove after final machining.
LEARN MORE ABOUT CARVEMSMART SOFT JAWS –>
Parts Requiring Maximum Face Access
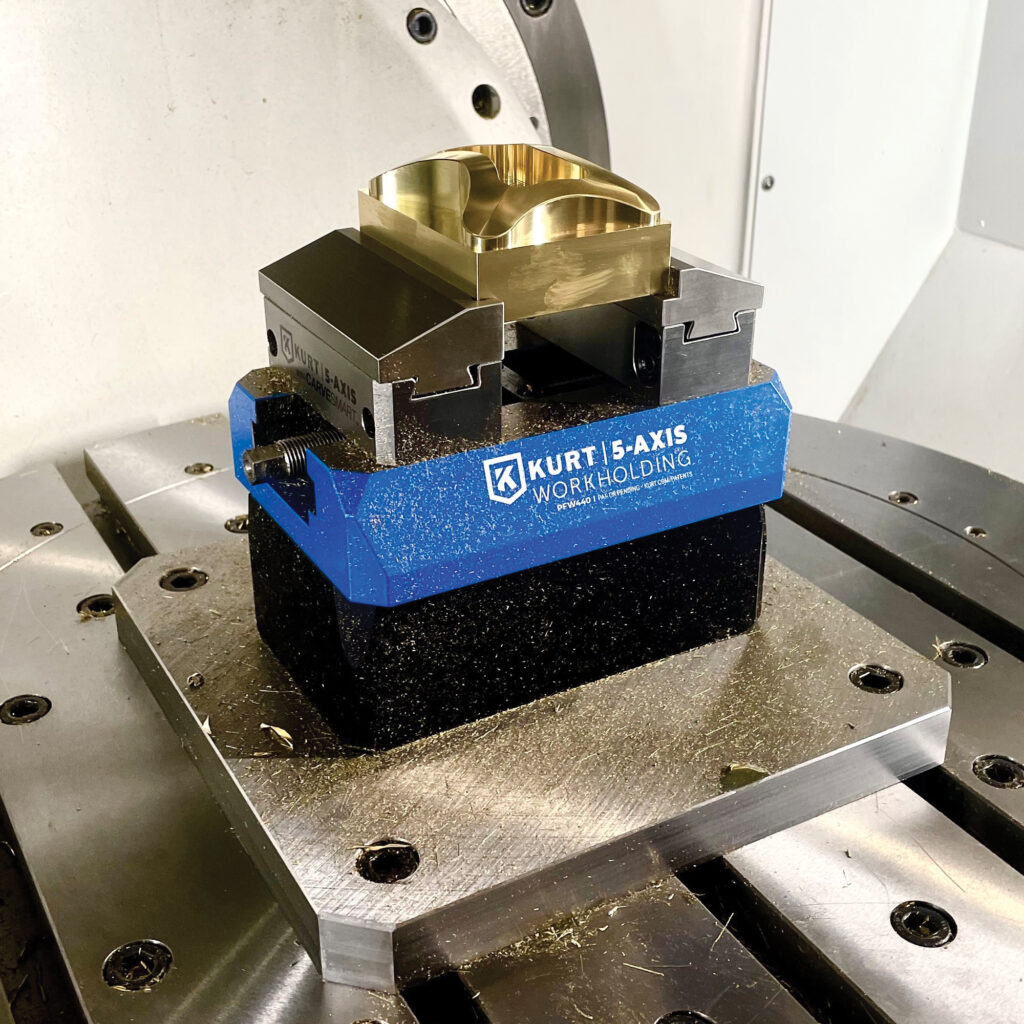
When you need to machine five full faces in a single setup, minimize the grip band. The vise holds the part by a narrow strip along the bottom edge, exposing the maximum surface area. Low-profile vises with shallow jaw depths are designed for this application. Kurt’s PF and PFW Compact Vises provide the reduced profile necessary to maximize tool clearance while maintaining clamping rigidity.
Mounting Options: Tables, Tombstones, and Pyramids
How you mount the vise affects the number of parts you can machine per cycle and the overall spindle utilization of your machine.
Direct Table Mounting
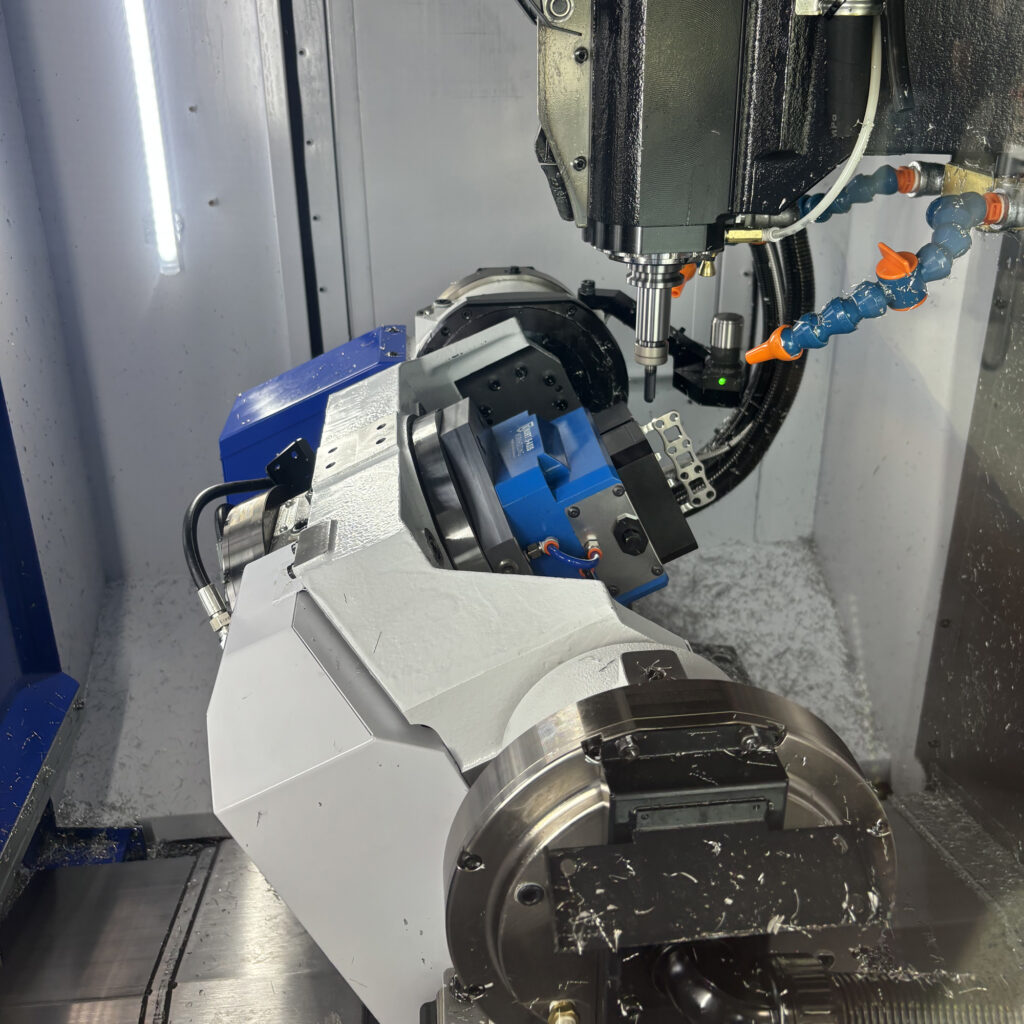
Mounting a single vise directly to the machine table is the simplest configuration. It works for prototype and short-run production where setup flexibility matters more than cycle density. Use T-slot mounting or a quick-change receiver base for repeatable positioning.
Tombstone and Tower Mounting
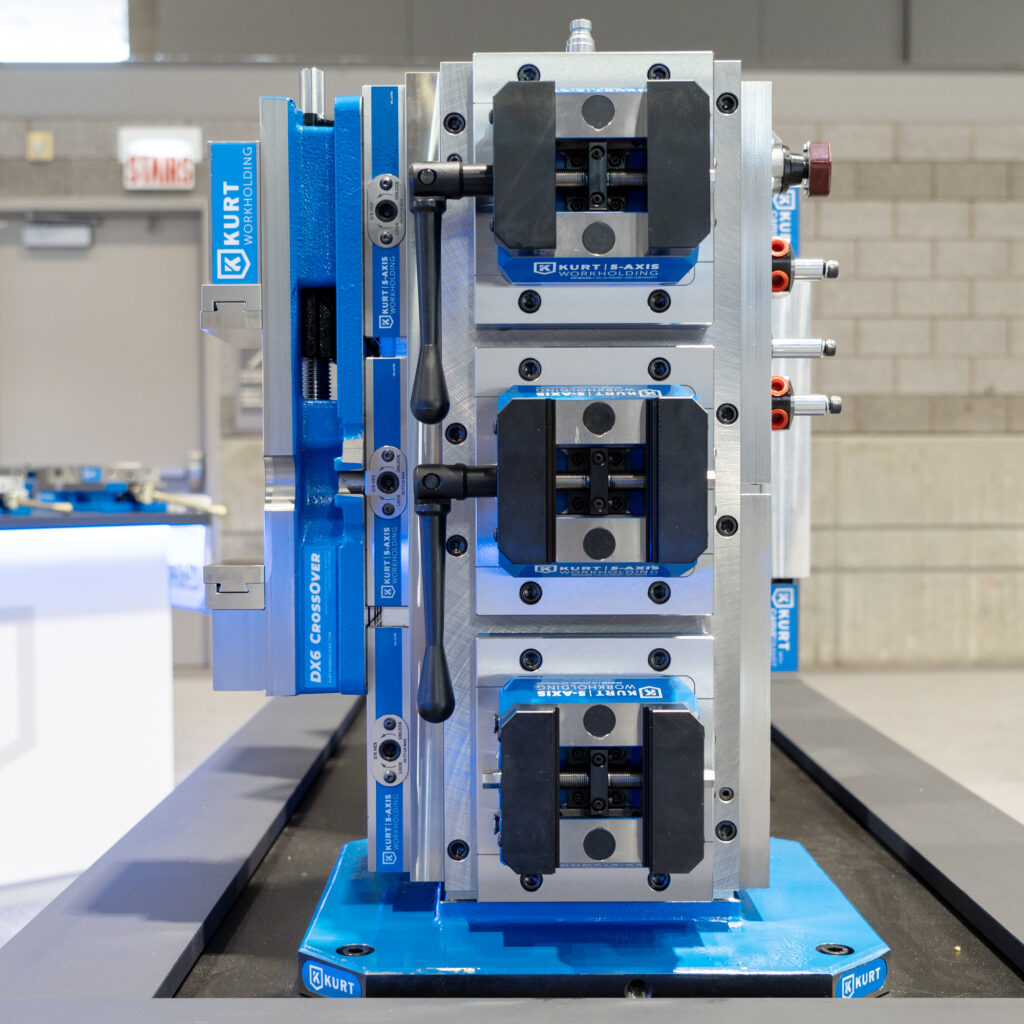
Tombstones and towers hold multiple vises on two or four faces of a vertical column. This multiplies the number of parts the machine can process before an operator intervention is needed. Kurt’s TriLock Towers support multiple PFW vises with CARVESMART jaws, providing a high-density fixturing solution for horizontal machining centers.
Pyramid Fixtures
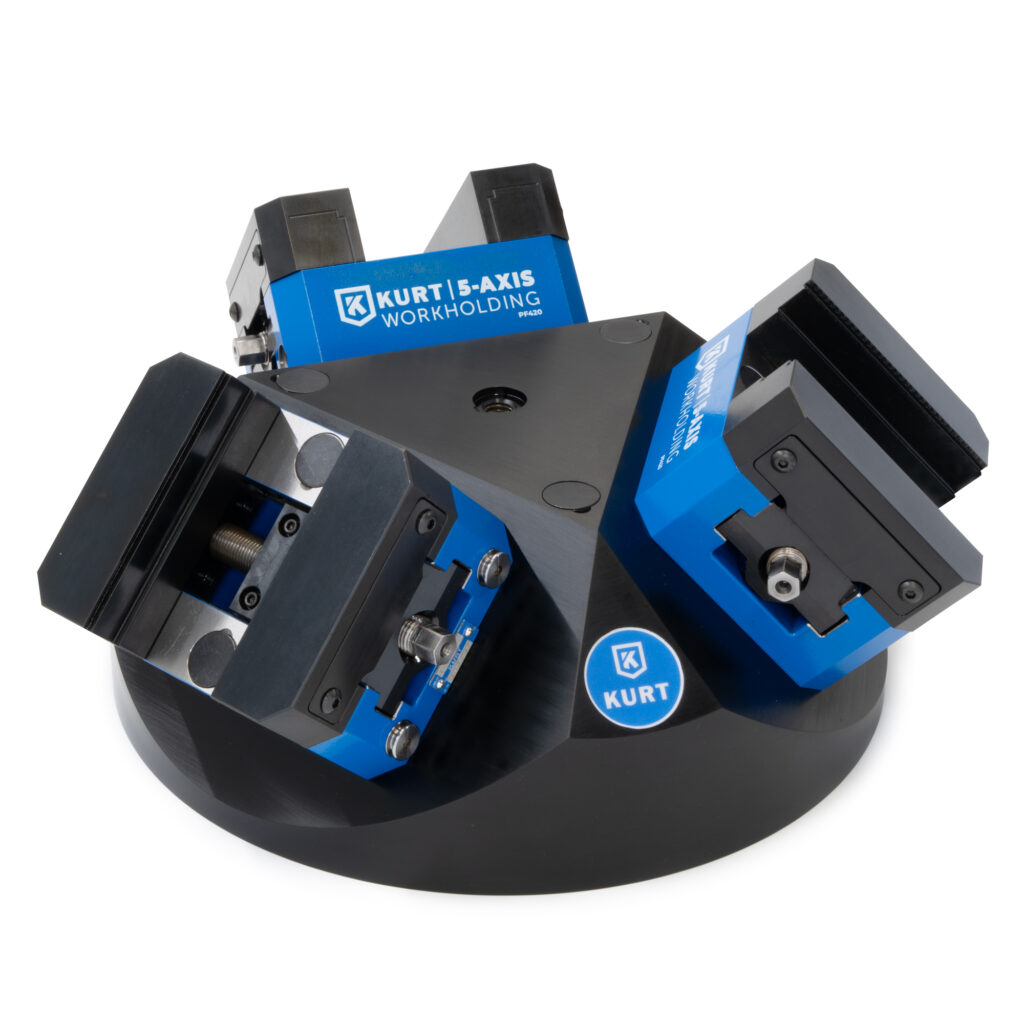
Pyramids mount vises on angled faces of a central structure, typically three or four faces. They are used on 4-axis and 5-axis machines where the rotary table can index between faces. Pyramids maximize the number of parts per cycle while keeping the total fixture height within the machine’s working envelope.
Automation Readiness: Preparing Your Vise for Robotic Loading
Automation in 5-axis machining is growing as shops pursue lights-out and reduced-labor-per-part production strategies. According to an IMTS overview of workholding automation innovations, quick-change interfaces and pneumatic actuation are among the most impactful developments driving automated CNC cells. A vise must support automated loading and unloading to participate in these workflows.
Key automation requirements include consistent jaw opening for robotic gripper access, pneumatic or hydraulic actuation for remote clamping control, and pull stud mounting for repeatable vise positioning. Kurt’s PFA620 Self-Centering Air Vises provide pneumatic actuation controlled by the machine tool’s M-code or PLC output, enabling automated clamping cycles without operator intervention.
The APW420 Air Receiver Base extends automation further by allowing a robot to load and unload multiple manual vises from a drawer or shelf system. The combination of air-actuated clamping and quick-change mounting creates a complete automated workholding cell.
A Step-by-Step Process for Choosing Your 5-Axis Vise
Use this process to narrow your selection from the full range of available vises to the one configuration that fits your application.
Step 1: Define Your Workpiece Requirements
Document the part dimensions, material, required tolerances, and the surfaces that must be machined. Identify which surfaces are available for clamping. Calculate the maximum cutting forces your toolpath will generate, including the worst-case orientation on the 5-axis table.
Step 2: Determine Your Machine Constraints
Check the machine’s table size, maximum workpiece weight, rotary axis travel limits, and any interference zones. Verify the pull stud pattern if you plan to use a quick-change base system. Confirm that the vise’s footprint and height allow full rotary travel without collision.
Step 3: Select a Vise Type
Choose between a self-centering vise and a fixed-jaw vise based on your positioning requirements. If you run mixed part families with varying blank sizes, a self-centering design reduces setup effort. If you run dedicated production on identical blanks, a fixed-jaw vise may offer marginally higher clamping force.
Step 4: Choose Your Jaw Configuration
Select serrated jaws for roughing, soft jaws for finish work, or a quick-change system like CARVESMART for shops that switch between jaw types frequently. Ensure the jaw height matches your tool-clearance requirements.
Step 5: Plan Your Mounting Strategy
Decide whether you will mount the vise directly to the table, on a quick-change base, on a tombstone, or on a pyramid. This decision depends on your production volume, cycle density goals, and whether you plan to automate loading.
Step 6: Validate the Setup
Before committing to production, run a dry cycle to verify tool clearance at every rotary position. Load a test part and measure positional repeatability across multiple load-unload cycles. Confirm that the clamping force holds the part securely through the most aggressive portion of the toolpath.
Common Mistakes When Selecting a 5-Axis Vise
Shops transitioning from 3-axis to 5-axis machining often carry over assumptions about workholding that do not apply to multi-axis work. Avoiding these mistakes saves time, material, and machine repairs.
Using a Standard Vise on a 5-Axis Machine
A 6-inch milling vise designed for 3-axis work is too tall and too wide for most 5-axis applications. The body interferes with rotary motion, and the jaw height blocks tool access to the lower faces of the part. Invest in a purpose-built 5-axis vise from the start.
Ignoring Jaw Lift in the Selection Process
Not all vises control jaw lift. A vise that relies solely on screw thread friction to resist lift will introduce positional error that compounds across multiple faces. Look for a mechanical anti-lift system, such as the AngLock® design, that actively counters the lifting force.
Overlooking the Mounting Interface
Bolting a vise directly to the table with T-slot clamps works for prototyping, but it consumes setup time on every job change. If your shop runs multiple part families, a quick-change base system pays for itself through reduced changeover time within weeks of installation.
Choosing the Right 5-Axis CNC Vise
Selecting a 5-axis precision CNC vise comes down to matching the vise’s mechanical capabilities to your workpiece requirements, machine constraints, and production goals. Prioritize jaw lift control, repeatability, and clamping force as non-negotiable performance criteria. Then factor in setup speed, jaw flexibility, and automation readiness based on your shop’s operational model.
Kurt Workholding’s 5-axis vise lineup provides engineered solutions across this full range of requirements. The AngLock® mechanism controls jaw lift. The PF and PFW Series deliver self-centering repeatability in compact, low-profile packages. CARVESMART jaws cut changeover time to seconds. And quick-change base systems with 52 mm and 96 mm pull stud spacings enable standardized, automation-ready fixturing across your entire shop.
Start by defining the parts you run most often. Map the surfaces, calculate the forces, and identify your changeover frequency. Then match those requirements to a vise and mounting system that delivers measurable performance.
FREQUENTLY ASKED QUESTIONS
What is jaw lift and why does it matter for 5-axis machining?
Jaw lift is the upward displacement of the movable jaw during clamping. In 5-axis machining, even 0.001 inches of lift propagates across every machined face, causing tolerance stack-up and scrap. Kurt Workholding’s AngLock® mechanism uses a mechanical wedge to force the jaw downward, actively reducing lift at the source.
How does a self-centering vise improve 5-axis setup accuracy?
A self-centering vise moves both jaws equally toward the center, placing the part at a fixed coordinate origin regardless of blank size variation. This eliminates manual shimming and re-indication between parts. Kurt’s PF and PFW Series vises combine self-centering action with the AngLock® system for both positional accuracy and jaw lift control.
What pull stud spacing should I choose for a quick-change base system?
The 96 mm spacing works for larger vises and wider jaw openings, such as the Kurt PFW Series. The 52 mm spacing supports compact vises like the Kurt PF Series in high-density fixturing layouts. Choose based on your vise size and the receiver base pattern your shop standardizes on.
Can I use a standard 6-inch milling vise on a 5-axis machine?
A standard milling vise is typically too tall and wide for 5-axis applications. The body interferes with rotary motion and blocks tool access to lower part faces. A purpose-built 5-axis vise with a compact, low-profile body delivers the tool clearance that multi-axis machining requires.
How do I prepare my 5-axis workholding for automation?
Automated workholding requires consistent jaw opening for robotic grippers, pneumatic or hydraulic actuation, and quick-change mounting for repeatable vise positioning. Kurt Workholding’s PFA620 Air Vise and APW420 Air Receiver Base provide pneumatic clamping controlled by M-codes, enabling lights-out machining cells.
What jaw type is recommended for finish machining on a 5-axis vise?
Soft jaws machined to match your part profile are the standard choice for finish operations. They distribute clamping force evenly and prevent marking on finished surfaces. Kurt’s CARVESMART dovetail system enables fast jaw swaps using a single hex wrench, so switching between serrated roughing jaws and custom soft jaws takes seconds.